Wednesday, March 23, 2011

Kelee: Electric Kool-Aid Yarn Test

Last weekend was Maple Open House Weekend. We went to the Howrigan Family Farms in Fairfield where they still gather sap with horses. No, not those Howrigans in Fairfield who also gather sap with horses. These. Seriously, there are at least two sets of Howrigans in Fairfield who gather sap with horses. Is that only weird to me?

Not only did we eat sugar on snow (Note: please learn from our friend Ruby here and tie your hair back before you attempt to eat something super sticky like sugar on snow on a windy day), drink warm syrup from shot glasses, eat tons of baked goods, but they also fed us cheeseburgers just for being there watching them work. They were ridiculously nice, warm, and welcoming. We bought some Grade B syrup for our coffee shop for maple lattes and maple smoothies.

We went home with an incredible sugar high. Since nothing says sugar high like Kool-Aid, we decided to try dying yarn with Kool-Aid.

I have worked very hard not to become interested in dying or spinning yarn during the past. So while this venture was a step-forward for Craftiness, it was definitely a step back for Self-Control.

The whole process was so incredibly fun and easy and low-impact, that I can no longer remember why I resisted for so long. I followed a tutorial at Knit Pick. I used Lion Brand Fisherman's Wool which is a naturally off-whitish undyed yarn. It might have even been the Oatmeal one. This was all that I had on hand and I knew I wasn't safe to drive with the sugar high I was sporting.

It really is this easy. I circled the yarn around some chairs and made it into one long loop. This was probably the most difficult step because my evil and loved cat Gritty Kitty got completely tangled in the yarn, and I was afraid I was going to lose an arm trying to untangle her.

I got the yarn wet in not-too-hot water. I mixed up the Kool-Aid with water in emptied salsa jars. I didn't measure anything. I lightly squeezed out the water from the yarn and put the two ends into the jars.


I microwaved them for two minutes. Looked at them for a while. Let them sit for a while. And repeated it two more times. Seriously, could my microwave BE any higher?


When I lifted some of the yarn out of the Kool-Aid at this point, I could tell that the Kool-Aid was more clear than colored and declared it done.


I rinsed the yarn in the sink and washed it with a little dishwashing detergent because that's what I had sitting right there. I let it dry hanging elegantly from the shower rod. By the next morning it was dry.


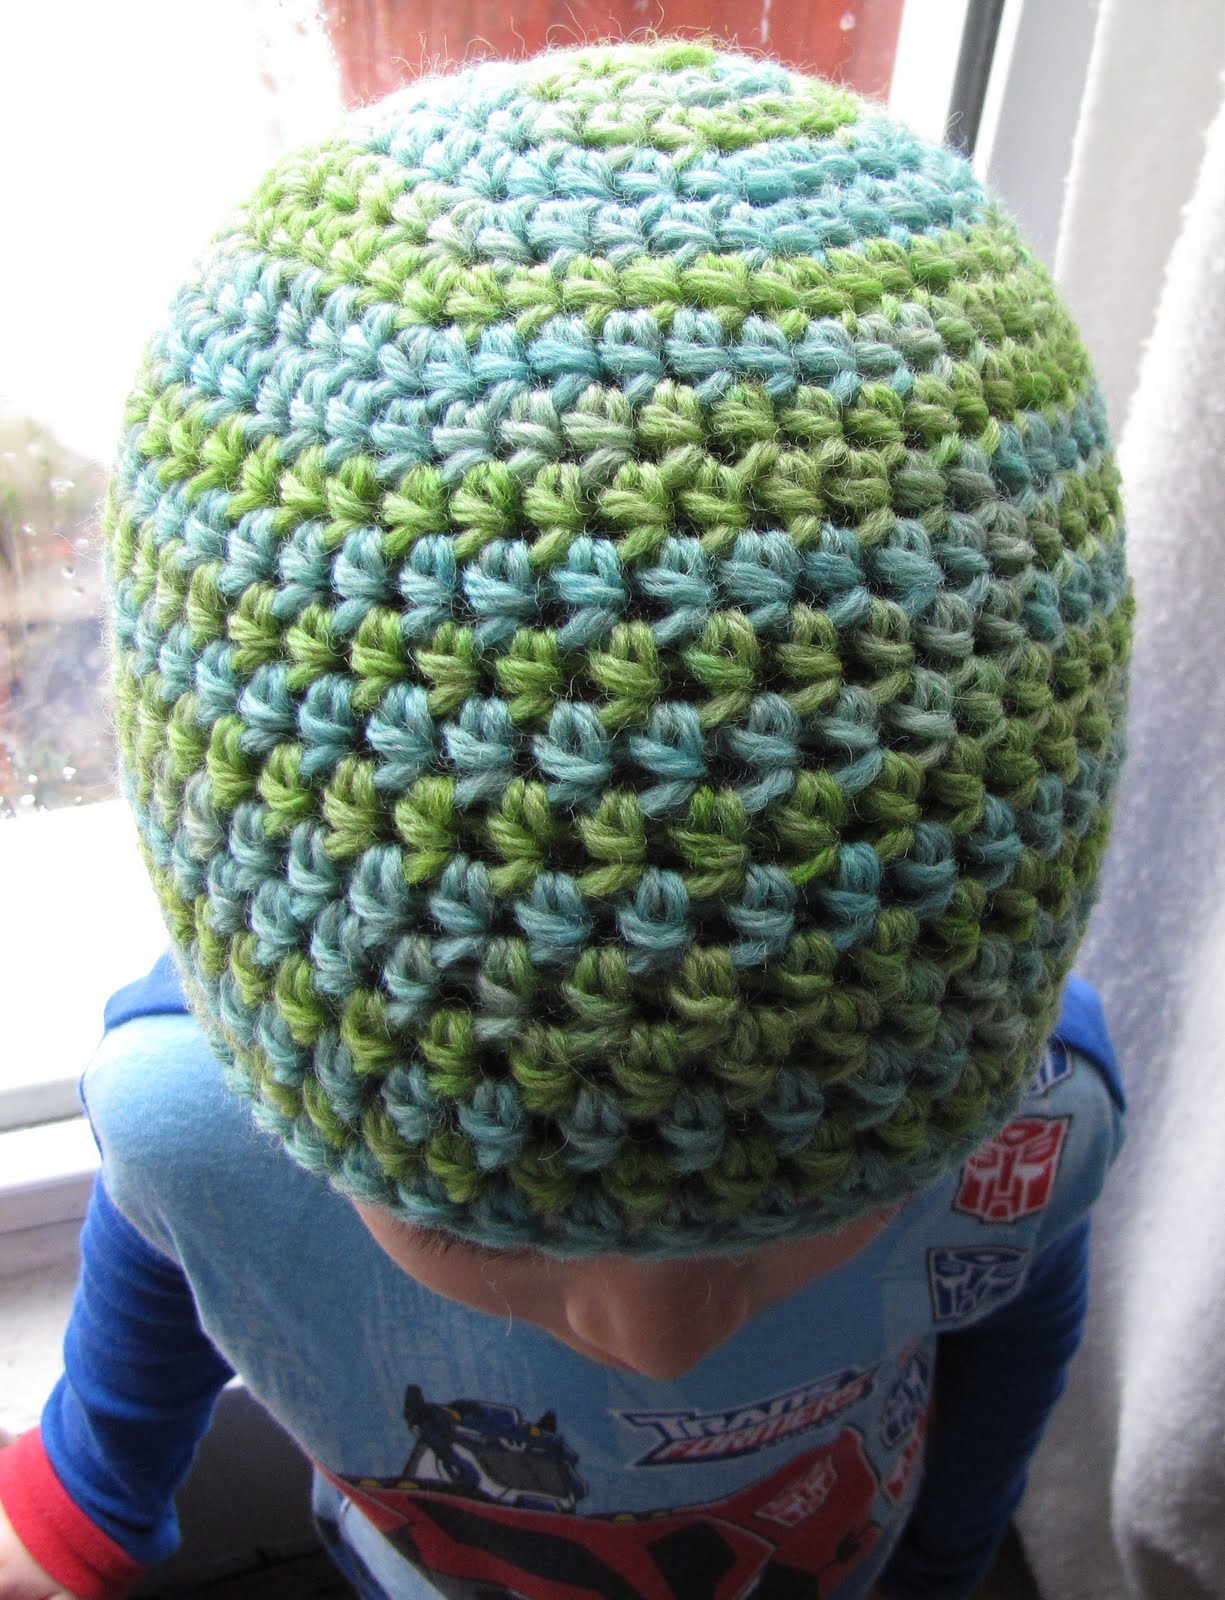
I immediately made a hat. I couldn't resist. It did a really cool striping of the two colors after a while for a while. My little guy claimed it for his own and has been wearing it ever since.

The next day after my sugar hangover had been cured by a heavy dose of bacon and a super hot latte laced with hair of the dog (mmmm...maple latte), I tried Kool-Aid dying some cotton yarn. Not only did the cotton yarn smell like it was seconds away from combusting and the Kool-Aid explode all over my microwave, but it did not look like a lovely purposefully dyed yarn. It looked like someone spilled Kool-Aid all over some string. I did not photograph the episode so you'll just have to trust me that I am telling you the truth. I read afterward that cotton yarn needs a little more umph than the flavorful gentleness of Kool-Aid. Dying this yarn was so terribly satisfying and quick and easy and I cannot wait to try it again. Luckily, Alison errand-upped us some white wool so we can give it another whirl.

As a side note, thank you to Kyla Hartigan and Ben Maddox for the pictures as I was too busy downing maple syrup by the cupful to take any myself.

Thursday, March 17, 2011

Alison: Oh, it's my week to write?


When I was a wee lass, I loved to draw.


So I went to art school.


I took lots and lots of life drawing classes.


I loved children’s books and wanted to be a children’s book illustrator.


And, I was an incurable romantic.


Then life happened,

blah, blah, blah.


And now, half a lifetime later,

life is such that I can write to you once every two weeks,

and spend two or three days a week

in the basement making things.


So. This is what I am making now.


First I had a *vision* and sketched it out one night when I couldn’t sleep.


I found some soft sculpey in a shop while visiting my sister and mom in Connecticut. So I made a face.


Then I made its body from electric fence wire and batting.


The fabric covering the doll is soft like a baby blanket.


I added a little color to the face,

and voila, my rabbit child.


Maybe I was influenced, deep down, by Maurice Sendak’s illustrations ('In the Night Kitchen' or 'Where the Wild Things Are'), but really I think it was from that series of illustrations I made of the girl and mouse in art school when I wanted to be a children’s book illustrator.


It is on display at Artist in Residence, a cooperative gallery on Main Street in Enosburg.


P.S. I accosted the Fed/Ex man yesterday because ...


My faaaabric arrived!

So I am headed to the cellar now, lighting candles, playing soft music, and will slooowly rip the bag to shreds and bury myself in my new purchases.


And, look at what I bought last night.... (*sight*)

I have NO idea what to do with it, but I looove this fabric and dreamt of it all week, after seeing it last weekend at Jo-Ann's in Burlington. I bought the rest of the bolt.


(*Heavy sigh*)

Saturday, March 12, 2011

Kelee: Granny Square Bag Tutorial

We have had a lot of snow this winter. I've got no complaints about the cold or the snow. I love Vermont winters. Eventually, however, that much whiteness on the landscape leads to the purchasing of and using of ridiculously bright yarn. Last spring I went through a green phase while I was waiting for ANYTHING to bud. So far this year, it's all about color. I especially like it when the colors bang off of each other.

I made up a few batches of granny squares (or “motifs” actually because they are not square) based on the same pattern from the crown of the mullet hat. Then I outlined them in the same color per batch and sewed them together in a purse-like structure. Although the granny square motifs were not all the exact same colors, they were similar colors. I lined them in black, heathered gray, and brown. It was amazing to see how the different outlined colors changed the whole feel of the motifs.


Here is a tutorial so you can make your own gorgey bags with yarns that are too ridiculously bright or that are too ridiculously muted, if that's what you want.


Step 1: Follow this pattern and make 9 motifs. Obviously, I think you should ignore their color suggestions and improvise your own. I used a size K needle and worsted weight yarn. You do what you want to do.


Click here for pattern website.

Click here for pattern pdf.

Step 2: Add another round of your outline yarn following a repeating hdc (in the chain 1 of the previous round), chain 1 pattern. Leave a long tail to use to sew together the motifs. If these instructions sound vague, note that by the time you get to this point in crocheting the motif, they will totally make sense.


Step 3: Sew together the motifs in this shape.

Step 4: Fold over and sew where appropriate.

Step 5: Fold up the bottom and sew.

Step 6: Crochet a (hdc, chain 1) row around the top of the bag. I went back and forth across the toppest straight row three times to make it tall enough to fold over the handle without folding the colored part. If your handle is super big, you may need a few extra rows. Then I did a (sc, ch 1) row to make it really looked finished. Of course, I put the real stitches in the ch 1 from the row before and I chained the appropriate number of stitches to start the row. Step 7: Sew on the handle.

Step 8: Line that bag so you don't have a tampon poking out of a hole.


Friday, March 4, 2011

Alison: Girls in white dresses with blue satin sashes...

I am learning how to make dolls. Continuing to learn, that is. I began almost five years ago with sculpey and small pieces of fabric and made lots of crazy faces with bits of cloth added to wire armatures.

After a couple of years, I thought I’d try fabric dolls.

Now I go between the two depending upon my mood.


Anyway, I will show you the fabric I purchased recently:

These cotton collections are from Nido in Burlington, Vt, I love the bottom piece of fabric,

a heavier cotton covered in a pattern of clothes on a clothesline.


This exotic bunch is from Banksville Designer Fabrics in Norwalk, Ct.

Aren't they delicious?


And here is where I get my inspiration...

Little animals by Pauline Temmes of Lemmikkiapina in Finland.

Dutch doll artist Ankie Daanen has an incredible eye for detail -

just look at those luscious fabrics!

US artist Leslie Molen made cloth dolls with wonderful costumes.

Also from the Netherlands, Marlaine Verhelst,


and Tine Kamerbeek, are inspired by fairy tales - they send my imagination soaring.


Hennie Koffrie is from Belgium. Her pieces like to take flight. I also love her unusual textiles.


And pieces by Jessica Robin of Whalefish Studios in Arkansas have a moodiness

and sense of alienation I can relate to.

These are the types of work I look at when I want to create a new doll.
In my work I strive to create pieces like those from Whalefish Studios; the work isn't polished, but contains raw emotion. The sculpey and bits of found material from the woods give her work a heavy silence, solitude and aloneness that speaks to me. Lemmikkiapina animals, in linen, wool and old lace have that quiet I love.

But then there are the rich fabrics I am drawn to. It is a hidden side of me (if I could only wear flannel, overalls and wool socks I would be happy) I can indulge on in my art.

It is a fun process - playing with fabric, modeling in clay, working with wire, batting, lace, paint, and whatever it takes to make a piece work...lichen, milkweed pods, sticks...

Well, time to head to the studio.